Rainy day project
After reading this post on Unwind I decided to do a little sprucing up in my craft room as well. I had been thinking about making wall hanging needle organizers for a while and this was just the kick in the hiney I needed.
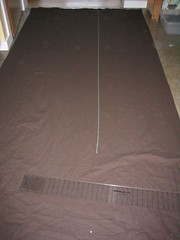
First, gather materials...

I knew I wanted the panel to be a chocolatey brown color. What I had in mind was some suiting wool. However, nowadays the ole' pocketbook is a little thin. We've had these super-long un-hemmed curtains from Ikea hanging in our bedroom for while. The scrap from the bottom is a perfect size for the base.
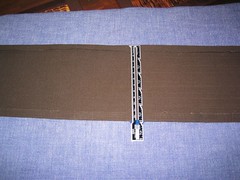
Next, measure the pockets...

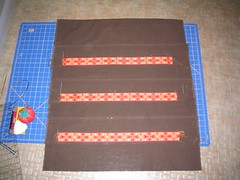
Add a little trim...

Right before the trim was added things got a little wonky. I decided to freezer paper stencil some gold numbers for the needle sizes right on to the fabric. Whoops! - serious operator error. So the trim moved from the center of the pocket to the bottom of the pocket. I'm as flexible as a wet noodle!
Stretch across some canvas stretcher bars, center and staple...

Add some shrinky-dink numbers...

Oh, crap! That's not shrink-paper! These were in the oven for some time without nary a curl or size reduction. I guess my shrink-paper instructions somehow got mixed in with some gloss photo paper. I think I kinda remember running out, now...
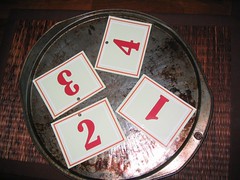
Finished with temporary photo paper labels...

Much better! I made check-out-cards for the WIPs but they looked way to cluttered sticking up out of the pockets so now they will nestle inside the pocket without showing on the top.
Now on to organizers for the straight and DPs.
First, gather materials...

I knew I wanted the panel to be a chocolatey brown color. What I had in mind was some suiting wool. However, nowadays the ole' pocketbook is a little thin. We've had these super-long un-hemmed curtains from Ikea hanging in our bedroom for while. The scrap from the bottom is a perfect size for the base.
Next, measure the pockets...

Add a little trim...

Right before the trim was added things got a little wonky. I decided to freezer paper stencil some gold numbers for the needle sizes right on to the fabric. Whoops! - serious operator error. So the trim moved from the center of the pocket to the bottom of the pocket. I'm as flexible as a wet noodle!
Stretch across some canvas stretcher bars, center and staple...

Add some shrinky-dink numbers...

Oh, crap! That's not shrink-paper! These were in the oven for some time without nary a curl or size reduction. I guess my shrink-paper instructions somehow got mixed in with some gloss photo paper. I think I kinda remember running out, now...
Finished with temporary photo paper labels...

Much better! I made check-out-cards for the WIPs but they looked way to cluttered sticking up out of the pockets so now they will nestle inside the pocket without showing on the top.
Now on to organizers for the straight and DPs.


3 Comments:
What a beautful needle holder. I love the colors you used. It looks good and is functional!
Lovely! I've been trying to get around to making some needle organizers for a while. I just know when I do I'll have to invest in the needle sizes I'm missing.
Where did you get the trim? Is it vintage? I have some pieces that look just like it but in shades of brown and black.
I am SO stealing this idea! Especially the check out cards. I am constantly wondering where needles went and going through ziplock bags of projects to find them!
I currently use a decorative hanging shoe bag (from the Target One-spot) to hold scissors, tape measures and other smaller things that clutter up my bookcase and desk, but this is brilliant for needles!h
Post a Comment
<< Home